|
How do I deploy to Tomcat using Ant?
Author: Deron Eriksson
Description: This tutorial describes how to deploy to Tomcat with Ant and Tomcat's Manager.
Tutorial created using:
Windows XP || JDK 1.5.0_09 || Eclipse Web Tools Platform 1.5.1 || Tomcat 5.5.20
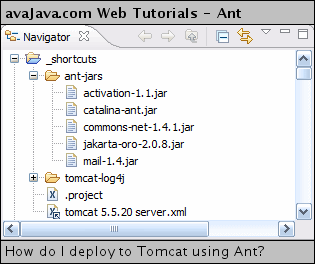
(Continued from page 1) The build.xml file utilizes a variety of additional jarW files. The commons-net and jakarta-oro jar files are used for ftpW (not covered in this tutorial). The activation and mail jars are used for emailing (not covered in this tutorial). The build.xml file contains several taskdef's, which utilize classes in catalina-ant.jar. The classes in these taskdefs are the classes that are used to communicate with TomcatSW. I copied the catalina-ant.jar from C:\apache-tomcat-5.5.20\server\lib and placed it in my _shortcuts/ant-jars directory in EclipseSW (_shortcuts is just a simple Eclipse project that I created that has links to things I use commonly and to various jar files and things). 
I added these _shortcuts/ant-jars/ jar files to my AntSW Home Entries in Windows → Preferences → Ant → Runtime. 
The build.xml file contains 4 taskdef entries, named start, stop, deploy, and undeploy. Each of these tasks represents an action that can be carried out on an application on the Tomcat server. Each calls on a JavaSW class to perform a particular action, and various values are passed to the class via attribute values in the build.xml file. <taskdef name="start" classname="org.apache.catalina.ant.StartTask" /> <taskdef name="stop" classname="org.apache.catalina.ant.StopTask" /> <taskdef name="deploy" classname="org.apache.catalina.ant.DeployTask" /> <taskdef name="undeploy" classname="org.apache.catalina.ant.UndeployTask" /> Now let's look at a particular target, the 'deploy' target. This target deploys our warW file (built by another target) to the Tomcat server.
	<target name="deploy" description="deploy to tomcat">
		<echo>deploying from client</echo>
		<deploy
			url="${tomcat-manager-url}"
			username="${tomcat-manager-username}"
			password="${tomcat-manager-password}"
			path="/${project-name}"
			war="file:/projects/workspace/${project-name}/${build-directory}/${war-file-name}"
		/>
	</target>
The 'deploy' target first outputs a message to the console using the 'echo' task. Following this, it executes the 'deploy' task, which passes the 'url', 'username', 'password', 'path', and 'war' values to the DeployTask Java class referenced in the taskdef entry in build.xml that we saw above. (Continued on page 3) |

